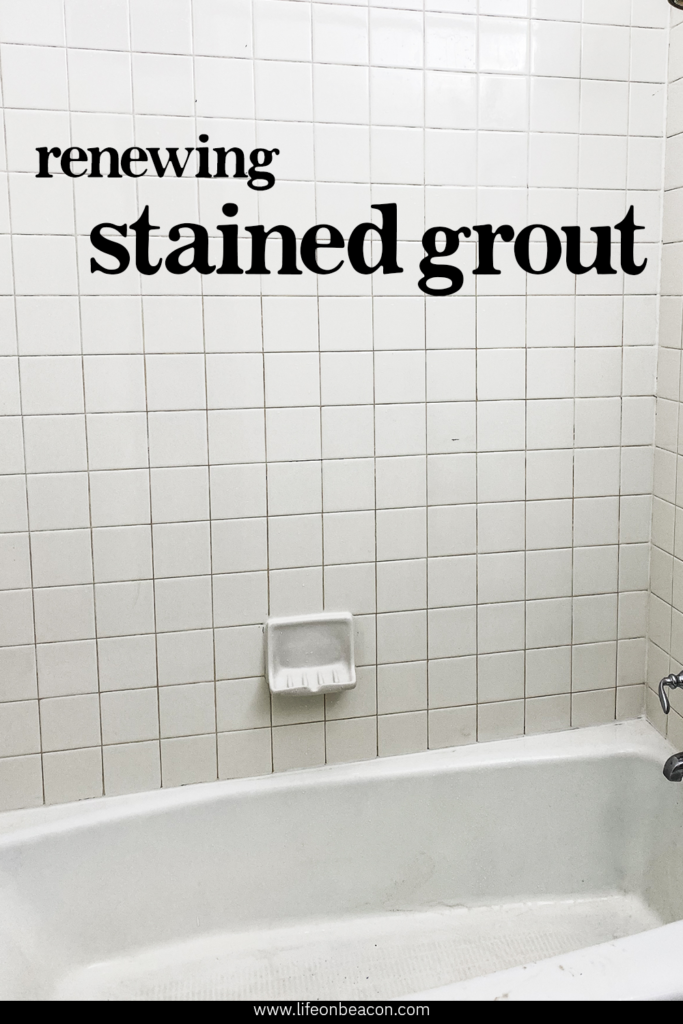
Our 1915 historic home has seen a lot of love – and a lot of wear and tear – over the last 100 years. The bathrooms were all redone at some point, but the once-white grout is starting to show it’s age. The tiles in what we call the white bathroom were in pretty good shape so we decided to see whether refreshing the old grout was an option, rather than retiling the whole space.
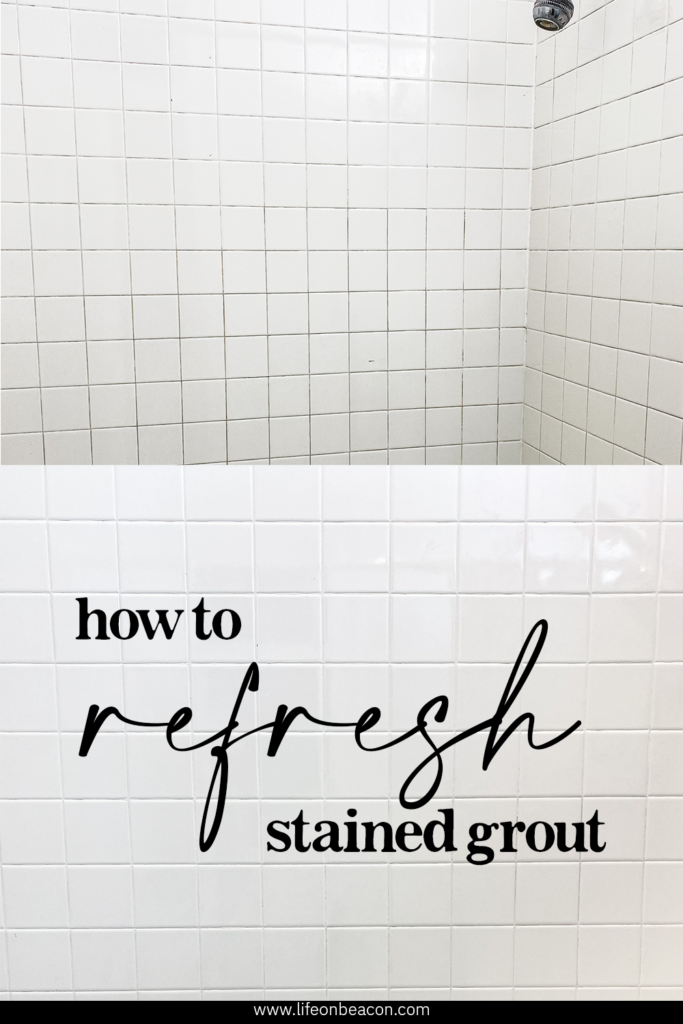
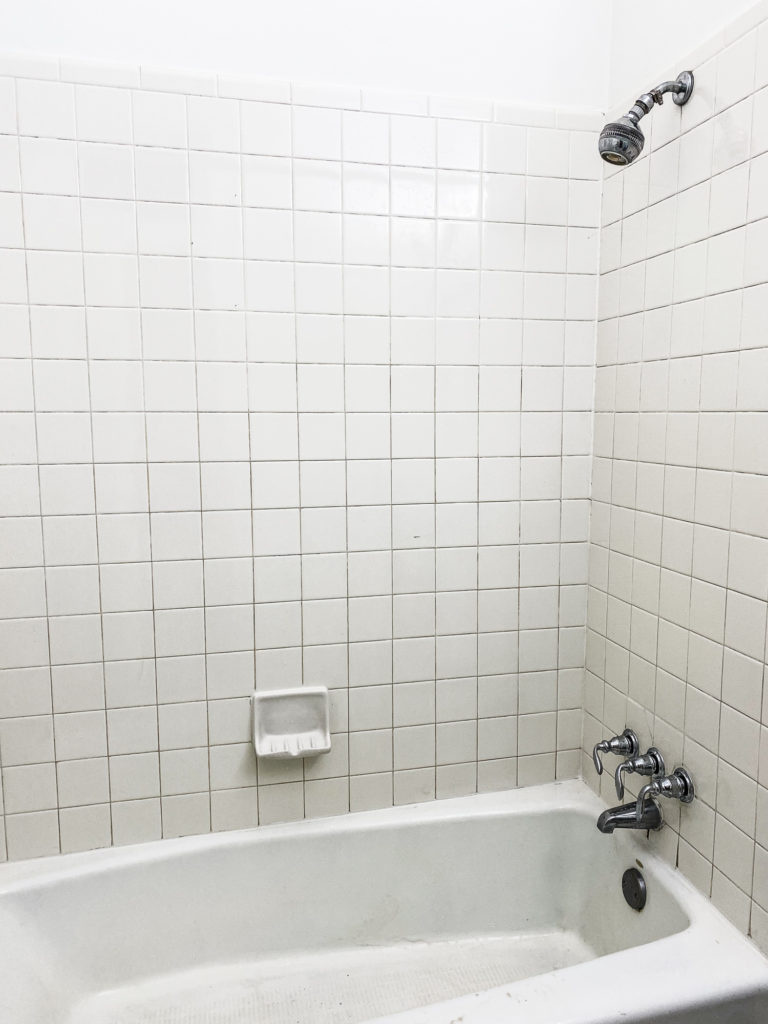
THE BEFORE
The grout was likely white years ago but had since turned brown/yellow in the most common places water hits.
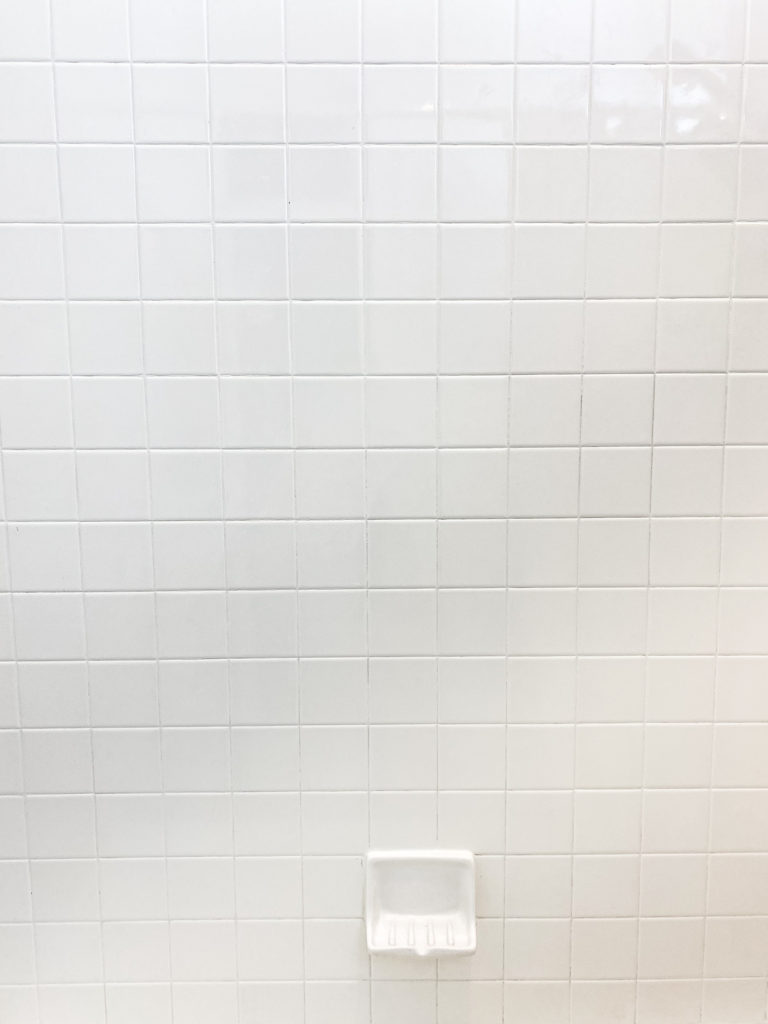
THE AFTER
Admittedly, I’m a little shocked this worked as well as it did. If it weren’t for a few cracked tiles near the faucet, it would look almost new!
THE PROCESS
The process of refreshing old grout could not have been easier.
- Mix the grout cleaner for use: 1 part cleaner to 3-5 parts water. Adjust the amount of water based on how dirty the grout is – the lighter your clean needs to be, the more water you can dilute it with. We used a 1:3 ratio to handle our mess.
- Apply the diluted grout cleaner to the tile and grout lines. Let sit for 3-4 minutes.
- Brush with a stiff bristled grout brush. Make sure you wear industrial cleaning gloves (we love these reusable ones) to keep the cleaning product off your hands!
- Mop the product up. Don’t let it dry on the floors! We opted for a small small bucket of hot water and microfiber cloths to clean it up.
- Wait at least 24 hours for the grout lines to dry.
- Apply grout renewal colorant in the color of your choice to the grout using a small bristled grout brush or old toothbrush. Quickly wipe the excess off the tiles, ensuring the colorant applies only to the grout lines. We used CBP bright white colorant for our shower walls and floors, although this Mapei option also came highly recommended.
- Let it dry for at least 24 hours before using the bathroom. We waited 3 days just to be extra safe!

We have been beyond impressed with the result. Our shower curtain hides the cracked tiles, so anyone who didn’t know these tiles were original actually thinks we redid everything in this bathroom. Can’t complain about that – especially since restoring the grout only cost us $40 and a few hours of time!