We’re on the constant search for new date night ideas while self-isolating at home, so of course, when I saw a friend had created homemade pasta on her IG stories, I knew we had to add that to the list. I’ve heard great things about the KitchenAid Pasta Roller and thanks to Target store pickup, had one of our own the very next day.
And y’all, it’s shockingly easy to use.
We made ours two different ways – a few times mixing it on the counters and a few times straight in the mixer. Both turn out great and start from the same base ratio:
- 100g flour
- 1 egg
- 1t olive oil (optional, but preferred for stuffed pastas like ravioli for additional pliability)
We typically make a 300g / 3 egg / 1T oil dough, which feeds 5-6. A lot of chefs recommend ’00’ flour, but we’ve been incredibly happy with all purpose (because finding ’00’ in this environment… nope.).
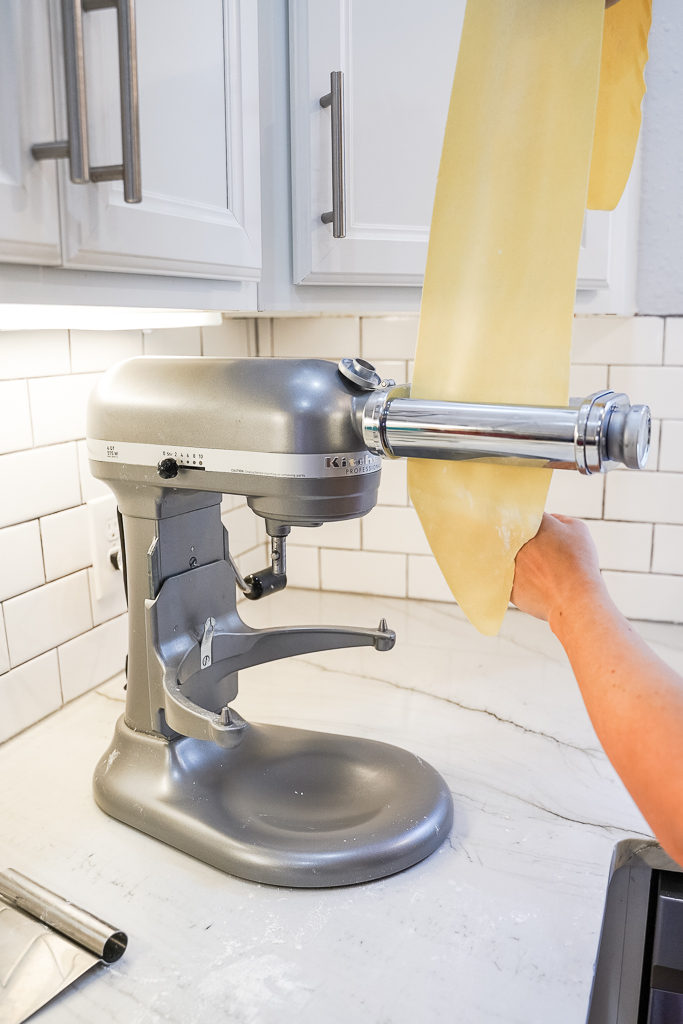
We have the KitchenAid Pro 600 6qt mixer and love it. Shop it here and the pasta roller attachment here, or click one of the images below.

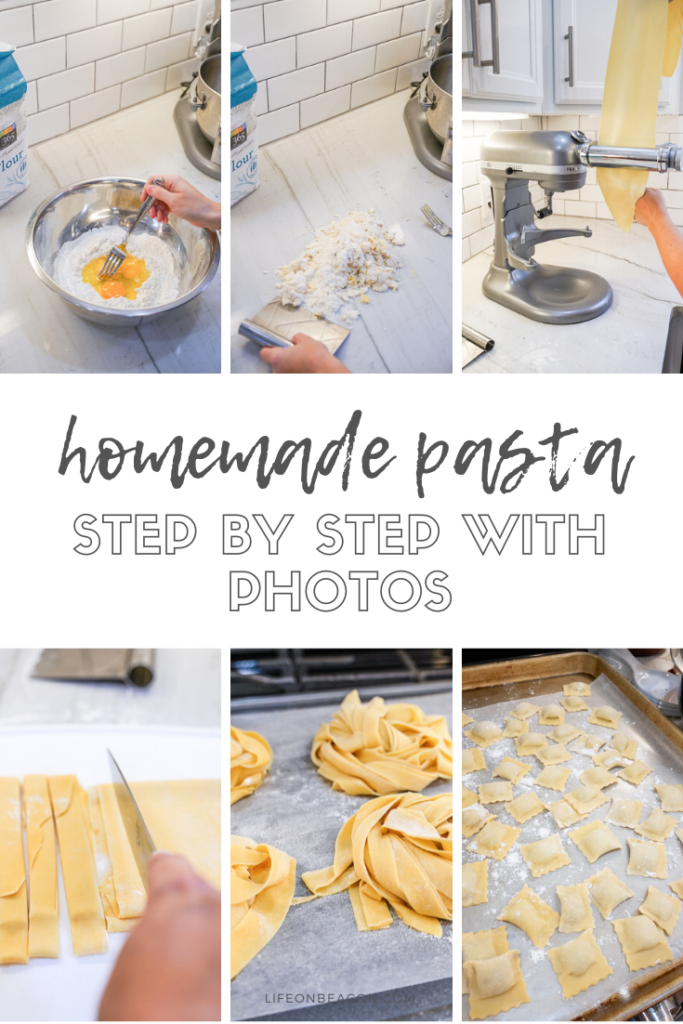
THE COUNTER METHOD
Pour your flour onto a clean, non-porous countertop. Any solid surface countertop should work – Corian, granite, marble, quartz, or quartzite (what we have, which is a natural stone with look similar to marble with the same durability as quartz). We have a butcher block countertop too, but generally avoid raw egg on it since it’s harder to clean. Alternately, you can use this method inside a large bowl.
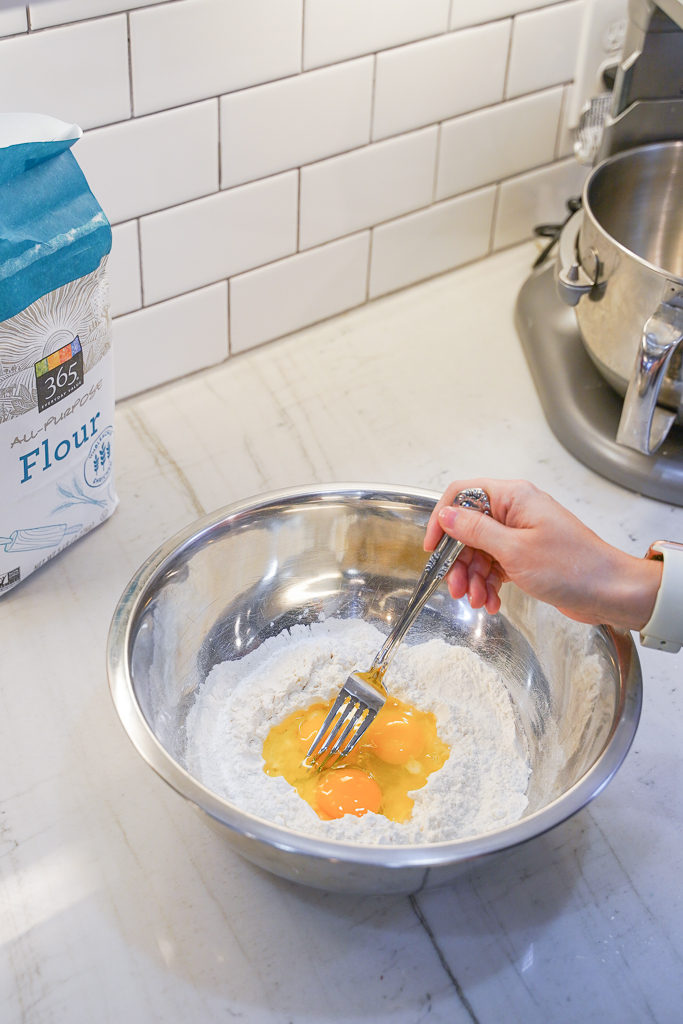
Using your fingers or a spoon, create a well in the center of the flour. Put cracked eggs and oil in the well. Begin whisking vigorously with a fork, slowly pulling in more flour as you go.
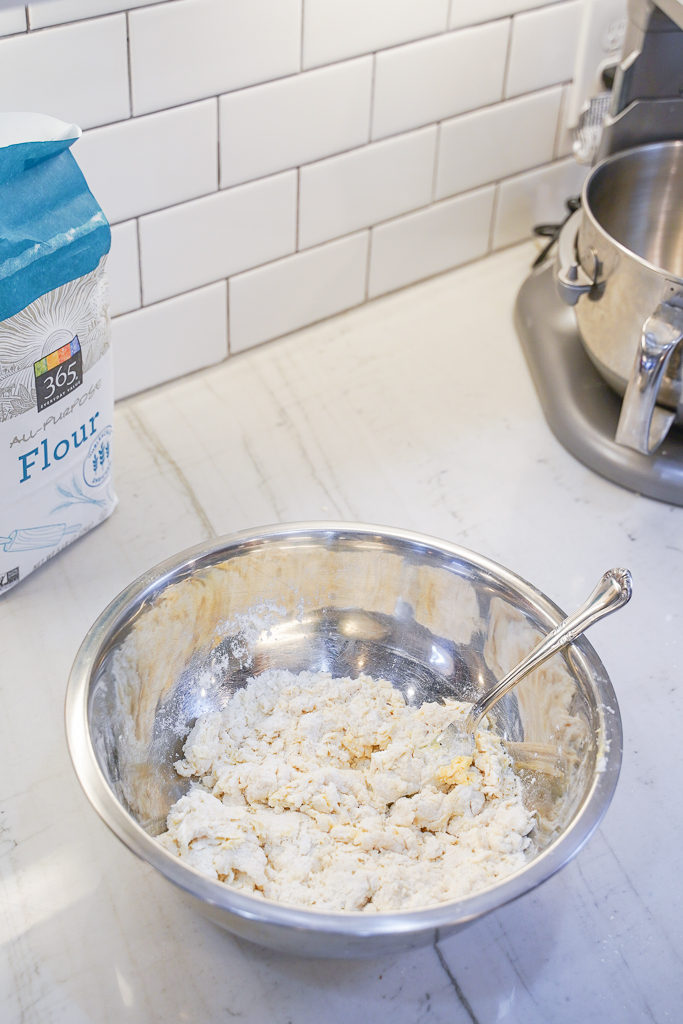
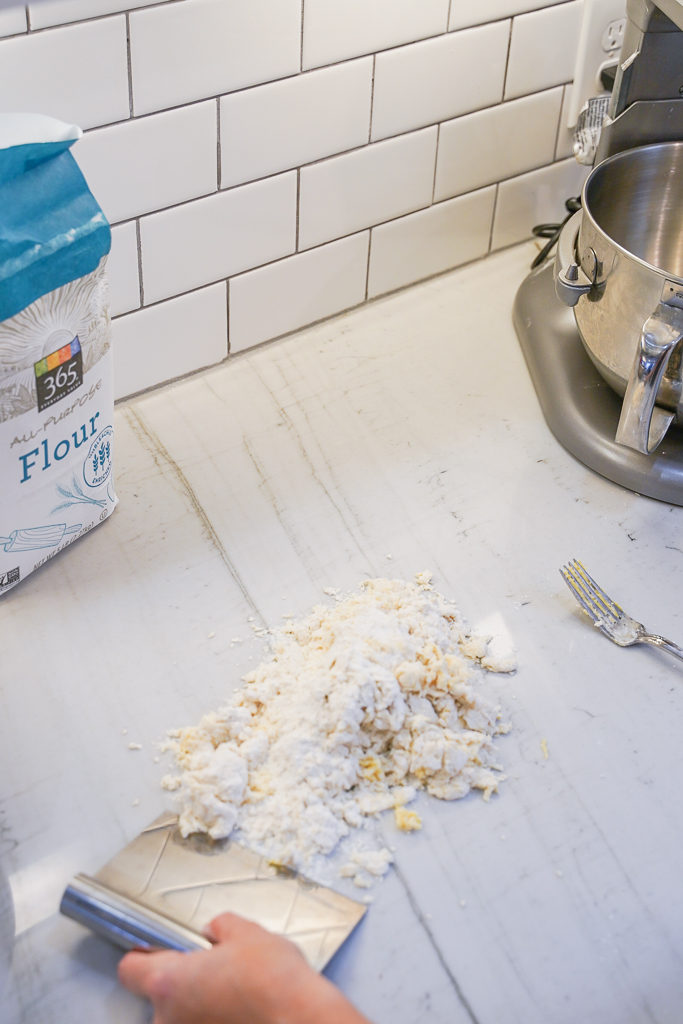
Once the dough reaches a firm consistency, use your bench scraper to finish folding the mixture together. Knead with your hands until well blended and light yellow.
Wrap in a tea towel or loose plastic wrap and allow to rest for 30-60 minutes.

THE STAND MIXER METHOD
Add the flour to the bowl of the mixer. Create a well in the center and add the cracked eggs and oil. Mix the ingredients together until combined. Swap to the dough hook and knead on low for 8-10 minutes until dough is elastic and light yellow. If the dough is not kneading well, you can pull it out of the mixer and finish kneading by hand.
Wrap in a tea towel or loose plastic wrap and allow to rest for 30-60 minutes.
HOW TO TELL IF YOUR DOUGH IS SUFFICIENTLY RESTED
If you press your finger into the dough when you first knead it (before resting), the finger print will quickly spring back. This is less than ideal for pasta – any rolling you do will just spring back. Once your dough is rested, a fingerprint should spring back slowly and partially, leaving an indentation.
You’ll find some recipes recommend resting the dough in the fridge – only do this if you’re not rolling the pasta for 90 minutes or so and ensure you’re wrapping it tightly in plastic wrap to avoid a film forming on the outside of the dough ball. The dough will still spring back if you only let it sit in the fridge for 30-60 minutes. If you opt for the fridge method, leave it out on the counter (loosely wrapped in a tea towel or plastic wrap) for 10-15 minutes before rolling.
ROLLING OUT THE DOUGH
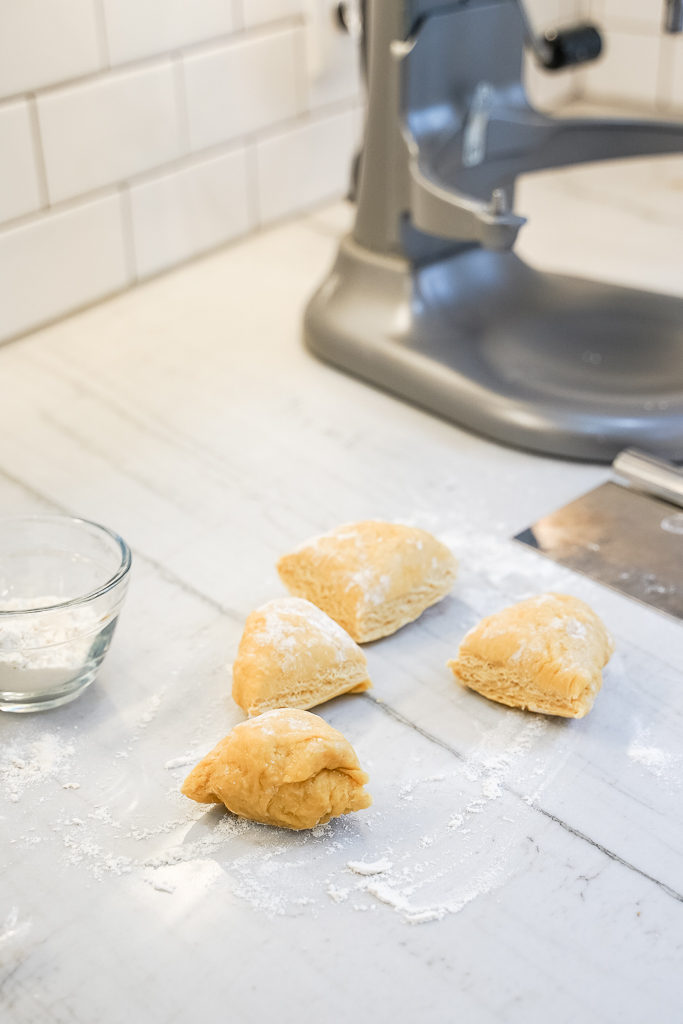
The KitchenAid pasta roller attachment makes the dough rolling process so easy. Cut the dough into workable portions using a bench scraper or knife (we divide into 4 for our 300g version). Set 1 section aside to work with, and return the rest to the plastic wrap or tea towel.
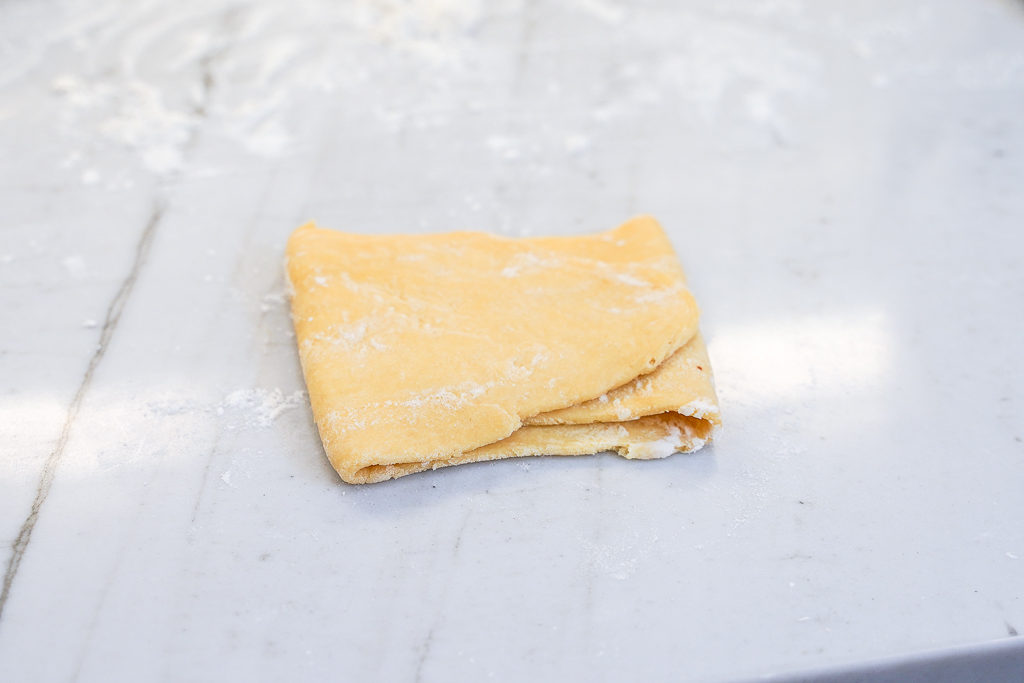
Shape the portion into a rectangle, about 2″ x 5″. Lightly dust with flour on each side. The flour dusting is key here – you want just enough for it not to stick to the roller. I “toss” a pinch of flour across the dough, then lightly using my hand spread it across. The resulting flouring should produce a consistency like suede fabric, without a visible white coating like bread. Do not flour your roller. It’s not necessary, and will cause issues with your roller over time.

Start the mixer at medium/low speed, and set the roller to a 1. Roll through. Take the resulting pasta and fold like a book (lay it lengthwise on your board, fold each short edge into the middle). Repeat the process 2-4 times. This will help you (1) produce a good rectangle shape to work from and (2) knead your dough a few more times.
Move up to 2 and run the dough through twice (no folding this time). run the dough through 2 times at each subsequent setting until you reach the thickness you want. Lightly flour the dough as needed – I usually find once at every setting, and sometimes only every other setting works great.

SHOP: STAND MIXER // PASTA ROLLER WITH FREE CURBSIDE PICKUP
The pamphlet that comes with your KitchenAid proposes sizes for different types of pasta. It’s been my experience that they’re all too thick. I bring everything to at least a 5 (raviolis), a 7 or 8 for heartier pastas (tagliatelle and pappardelle), and thinner for more delicate pastas.
CUTTING THE DOUGH
Once you’ve achieved your desired thickness, dust your pasta again lightly with flour. Make sure no “stickiness” remains or your pasta will stick together when you cut it. Fold the pasta lightly several times, end over end, until it’s small enough to cut. Slice with a knife into your desired thickness.
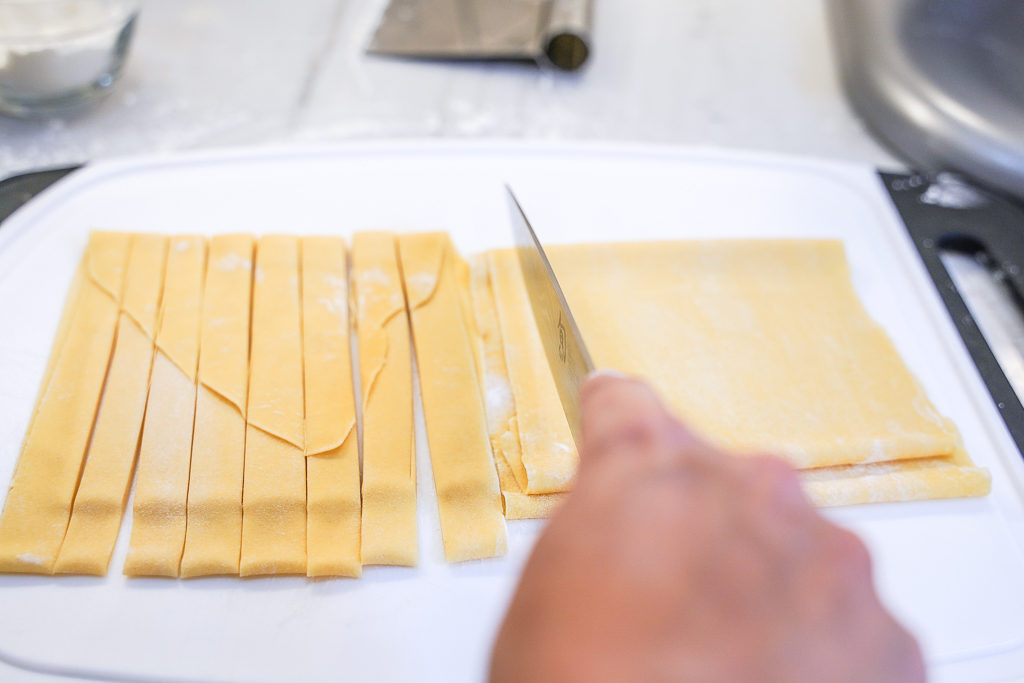
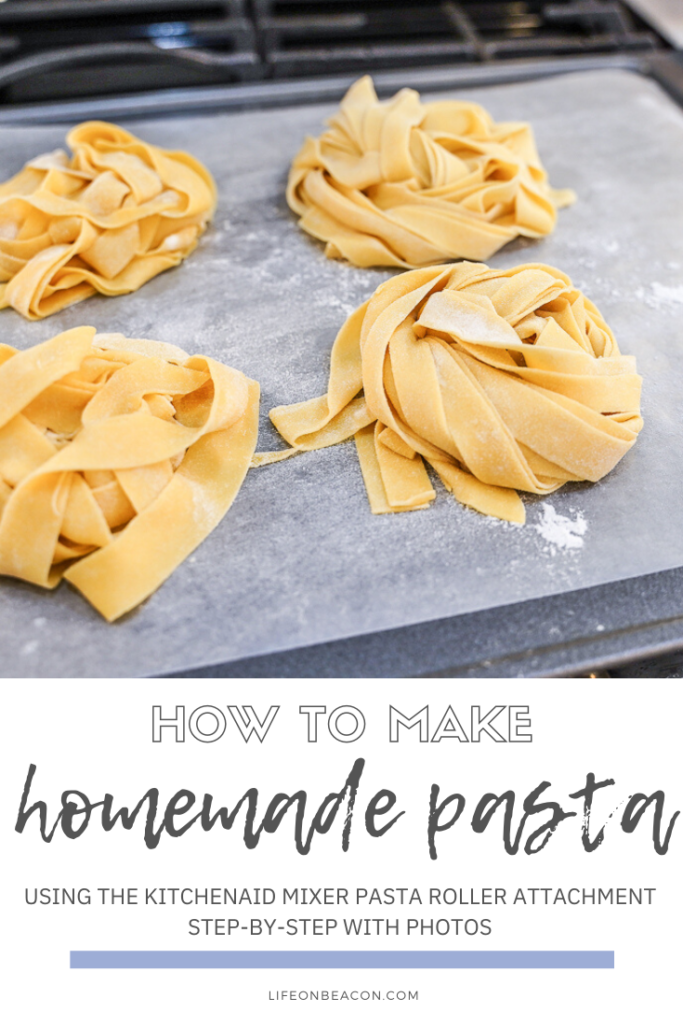
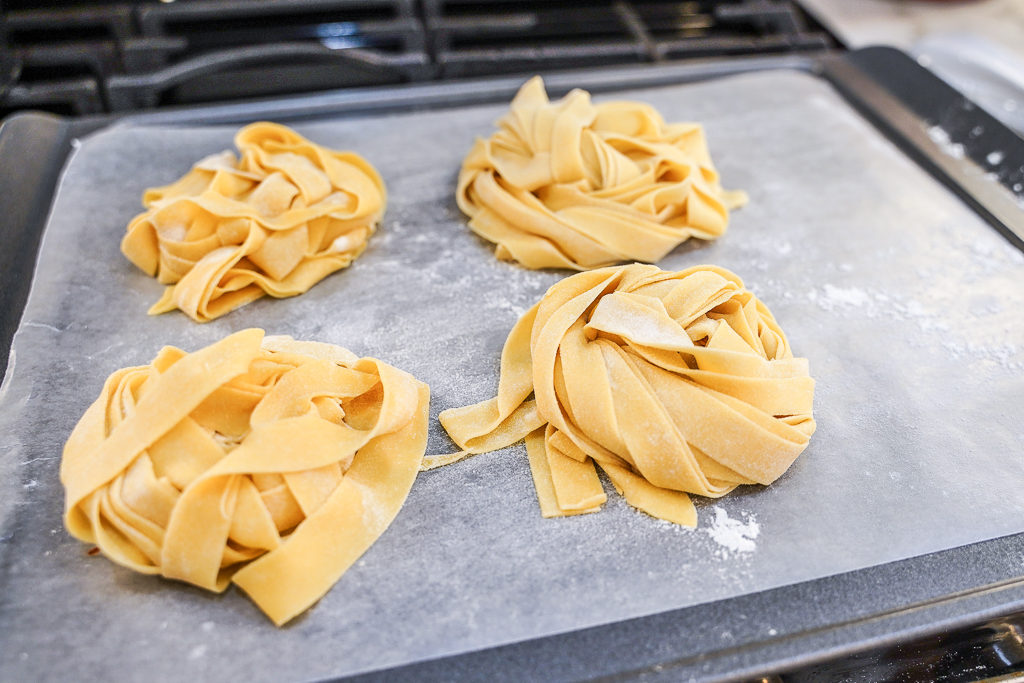
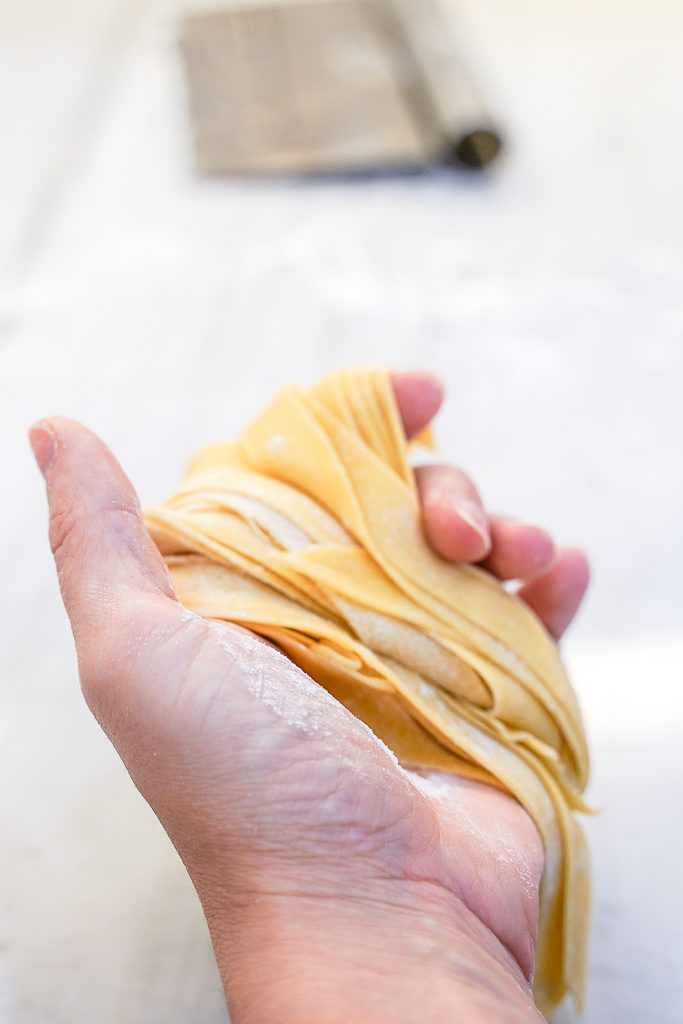
Toss resulting strands with a tiny bit of additional flour. Twirl into “nests” by wrapping the strands loosely around your hand, then putting your fingertips on a floured piece of parchment on a baking sheet and letting the noodles slide off.

You can then drop these nests into salted boiling water (boil first, then salt) or put the entire tray into the freezer, then move to a ziplock once frozen to cook later. No need to defrost frozen noodles before cooking – just cook for 1-2 minutes longer!
Pin this