Our little E loves playing in the mud – like will dig up our plants because they interfere with her “dirt digging” if we let her out of our sights for even a minute! In an attempt to channel that love away from our new vegetable garden, we decided to build E her own sand table for her to dig in, which can be swapped for a bin of dirt, water, or whatever other sensory activity we can think of.
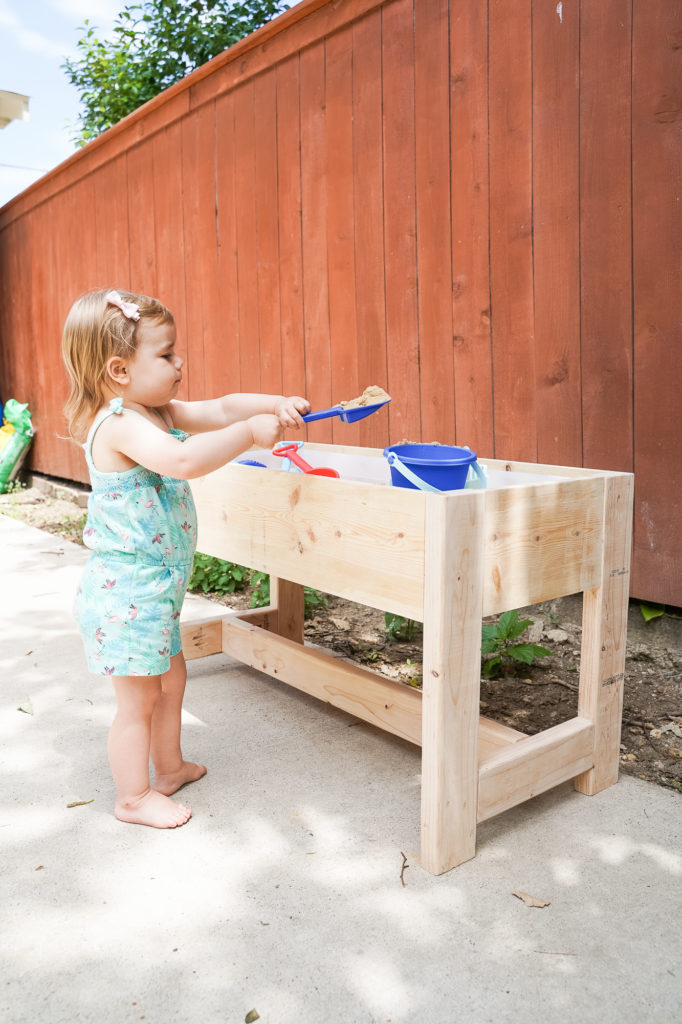
Our yard isn’t terribly large (which is why our playhouse is inside). Versatility and multiple uses for big objects is key! Instead of just creating a sand table, we decided to add a removable top to also transform it into a toddler-friendly outdoor table.
Check out Part 2 of this tutorial: How to build removable tabletop for the sand table
The width and length are determined by the bin you choose. Our measurements were based on this under-the-bed storage bin. We chose it both for its size, and because we know it’s regularly available at our local stores so if it ever cracks, we’ll be able to pick up a replacement (this is why we didn’t opt for a less-expensive store brand).

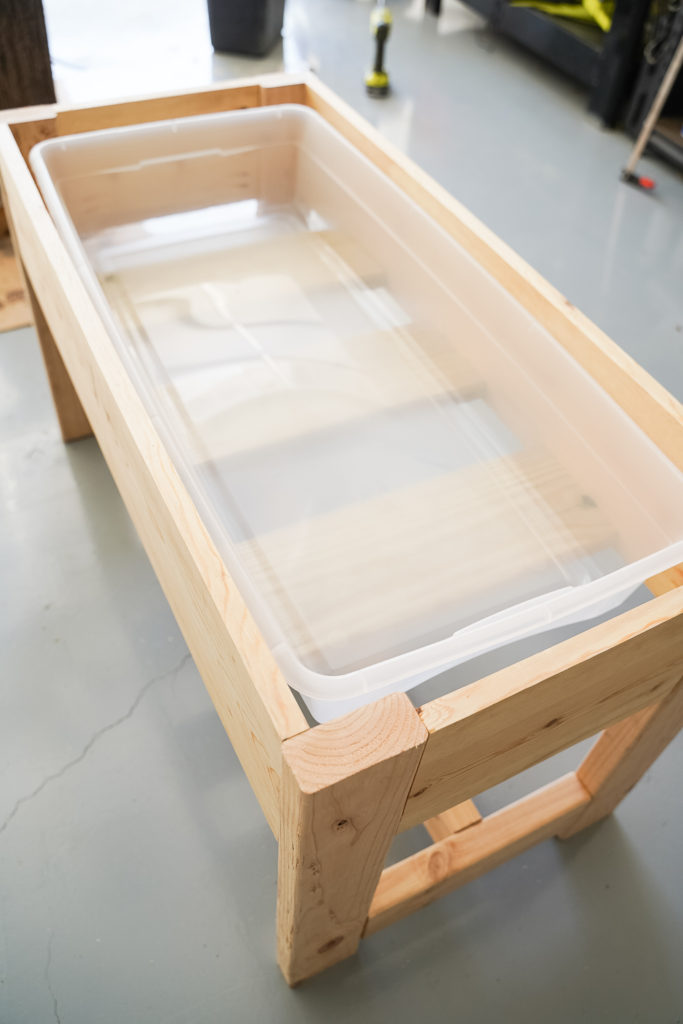
I promise that gap around the sides isn’t as large as it appears in these photos. It’s no more than an inch – enough space to get your hands in to remove the bin.
Our measurements also accommodate enough gap to get your fingers in to remove the bin – without so much gap that a ton of sand drops into the edges. Removing the bin can be helpful if you want to swap sand for another sensory filler like water (we keep two bins so we never have to empty the sand). It’s also constructed tall enough to accommodate the bin lid inside, so you can seal the sand off in a storm.

Budgets are tight during the pandemic and our goal here was to save money versus buying a pre-built, so we designed this while trying to minimize the number of different boards and get maximum use from everything we purchased. Building the sand table itself only requires 4 boards!
Again, we’re going to treat the tabletop as a separate project because not everyone will want to go that route. The table works so well on its own! It’s not included on this list – but only requires 2 additional boards!
DESIGN OVERVIEW

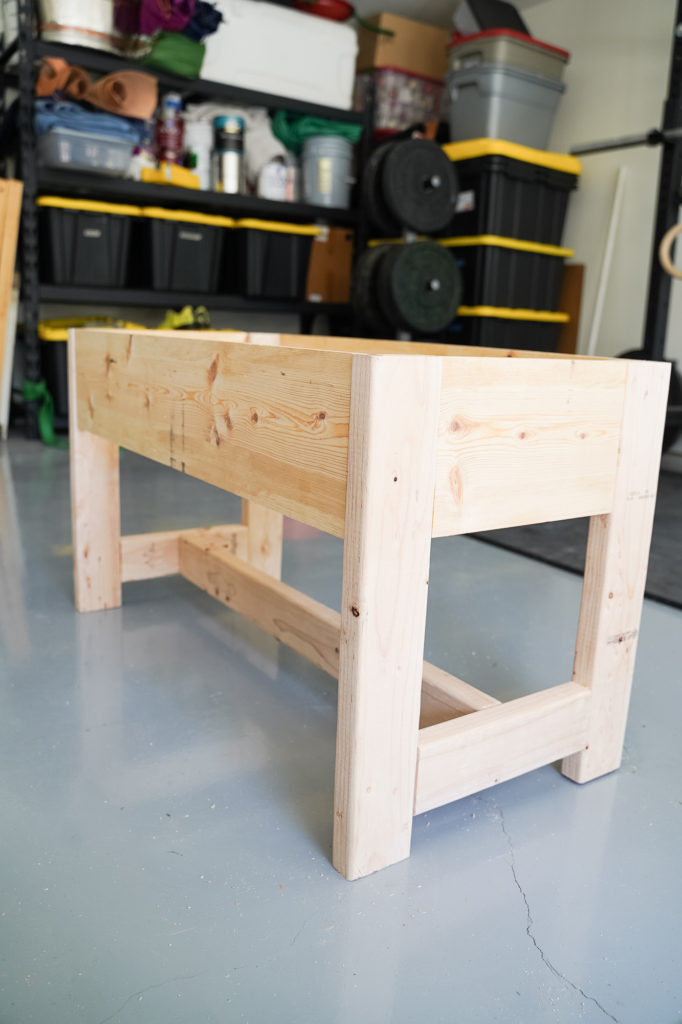
A note on dimensions: Our table is a little higher than most plans you’ll see out there because this is designed to double as a table or back-up bench when we have company over. We also wanted the table to grow with our 2 year old. If your kids are smaller or you don’t plan on using it as a table, cut the legs by 2″ to 20″ (rather than 22″). No other measurements need to change!
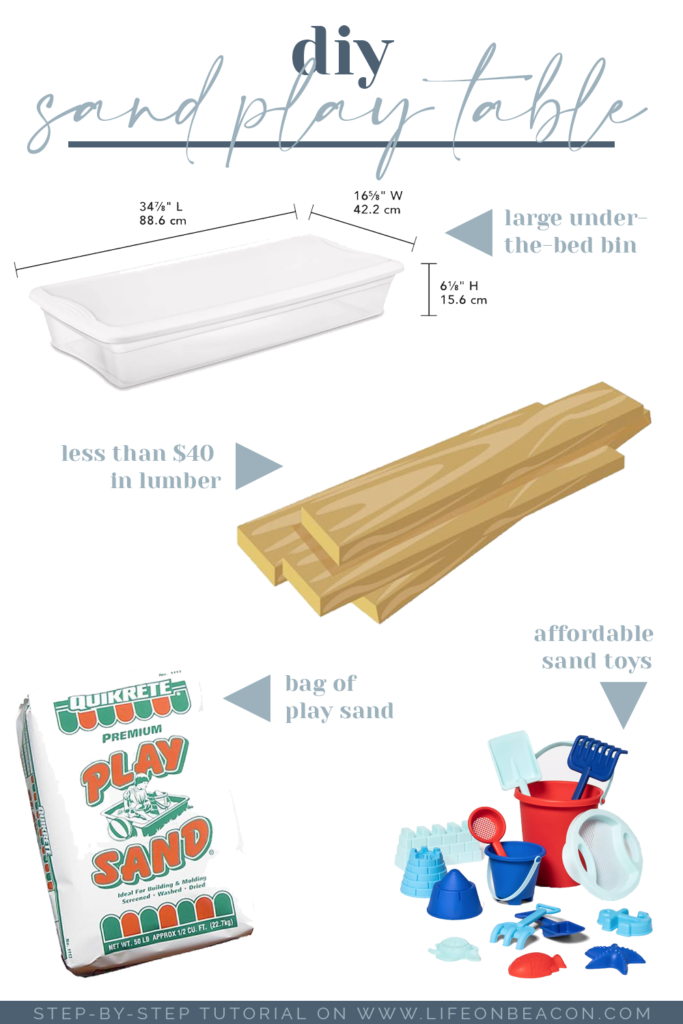
PURCHASE LIST
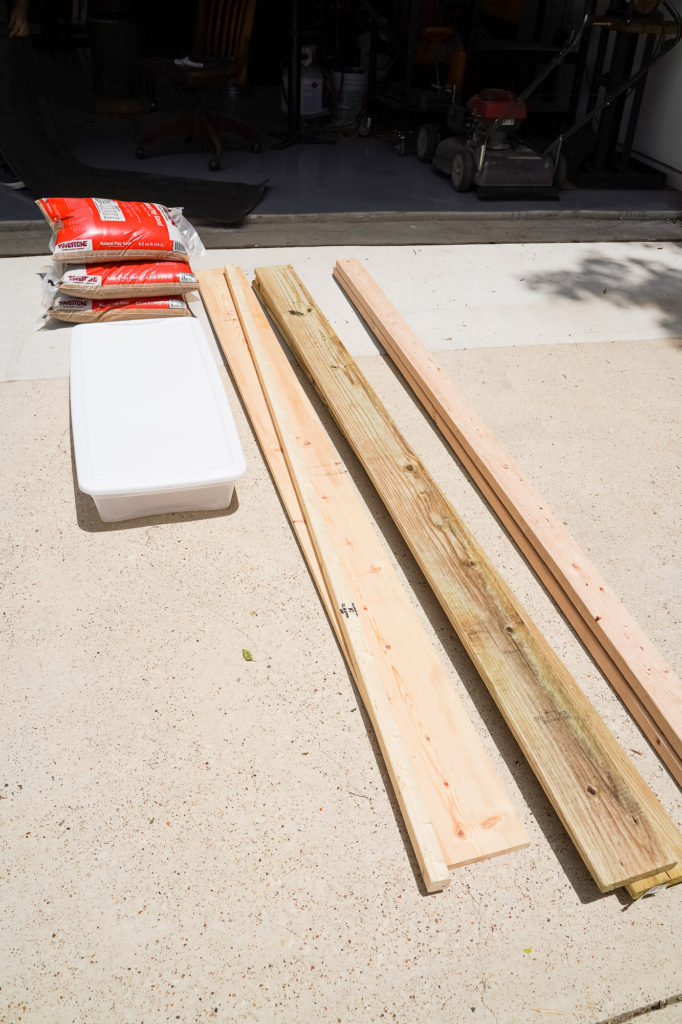
My husband way over-purchased on the play sand (above). We have enough to fill 3 tables! We also have two additional boards in this image for the removable tabletop.
- Under-the-bed storage bin with a lid (this option is available for drive-up pickup in most areas!). If you want the ability to swap sand for water or other sensory play, purchase more than one bin.
- Play Sand (1 bag was sufficient for the bin we purchased)
- One 1×8 x 8′ board
- One 2×4 x 8′ board
- One 2×4 x 6′ board
- One 5/4×8 x 8′ board
- Screws (see below under recommended tools for what you’d need if you want to use pocket holes)
- Optional, but recommended: Spar varnish to seal against the elements (whether staining or leaving unstained) or deck stain (we’re going to use some leftover for another project).
A note on the boards: We used common pine for all boards except the 5/4, which is a deck board and is pressure treated to hold up to the elements.
REQUIRED TOOLS
- Saw. We used a compound miter saw, however this could be cut by hand if needed.
- Power drill. We purchased this Ryobi cordless tool combo set a few years back and get so much use from it!
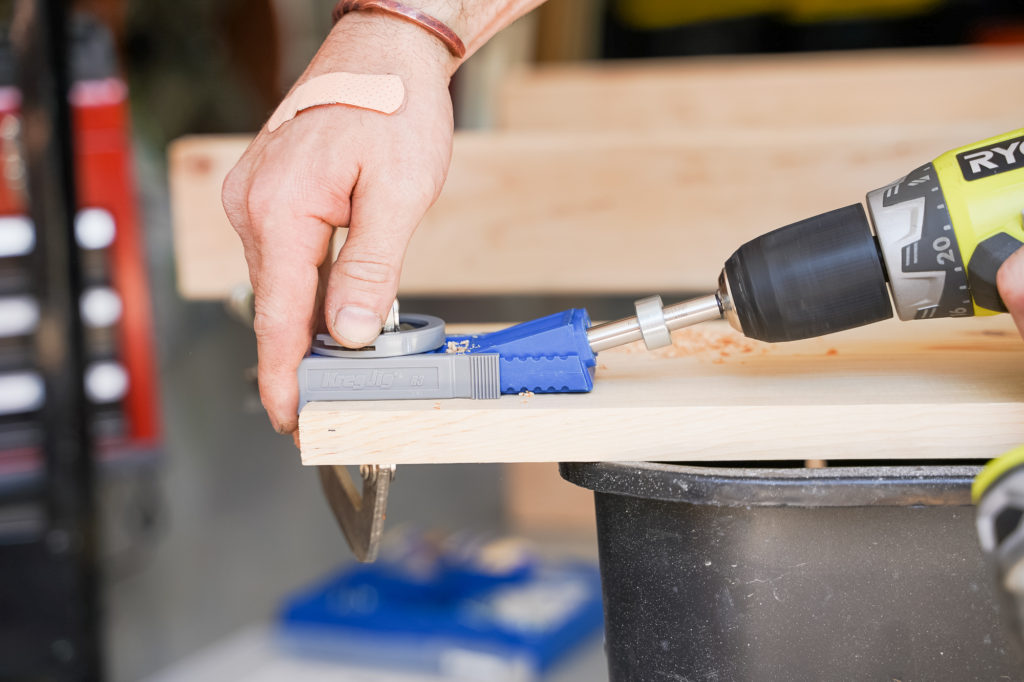
- Optional, but highly recommended: Kreg pocket hole jig system, clamp, and pocket hole screws. You’ll end up with a much cleaner looking table and save a ton of time and headache. Bonus: One “kit”, while about $70, will last you years of projects! The system comes with complete instructions for how to adjust to different size boards which makes this whole project so simple (even for a pocket hole novice like me!)
SHOP OUR RECOMMENDED TOOLS

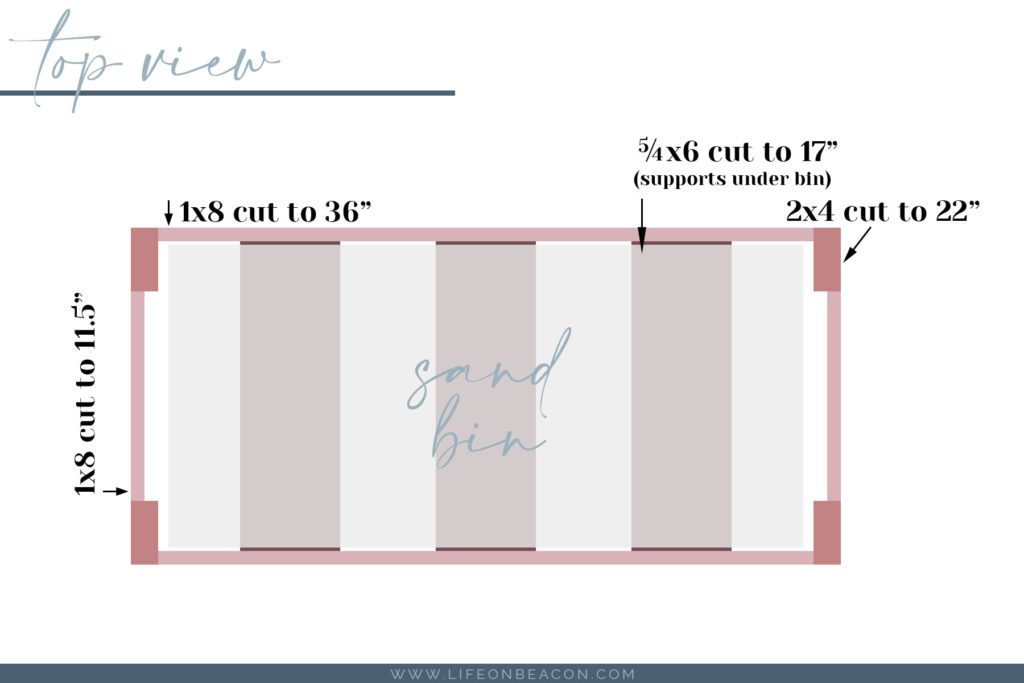
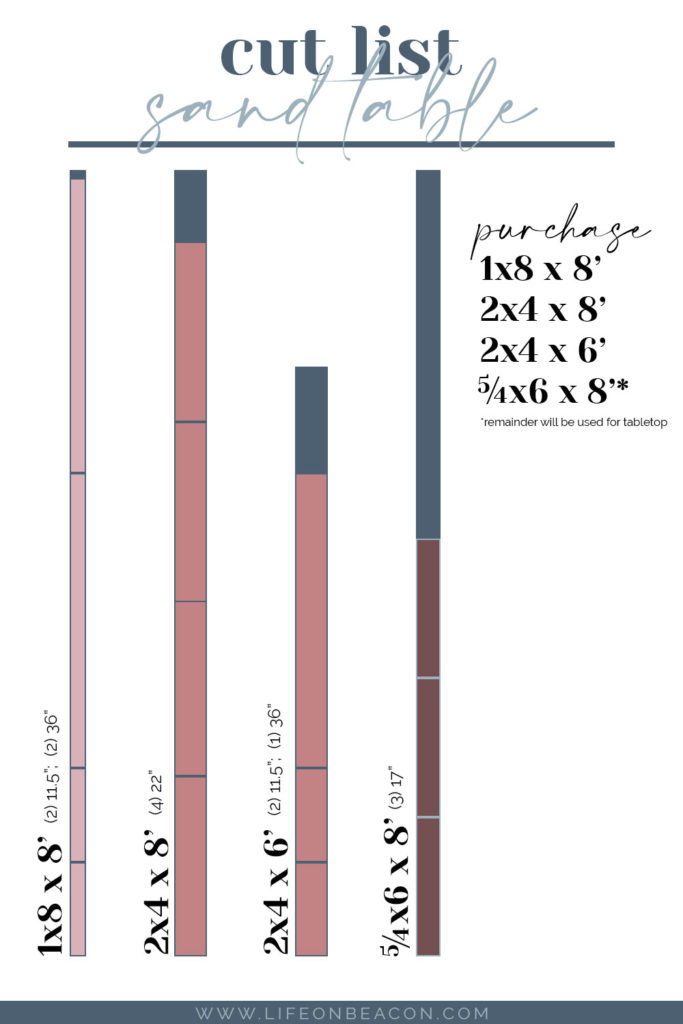
WOOD CUT LIST
Before you begin, re-measure your bin to make sure it will fit with the lid on. These cuts are designed for a bin that is 34 7/8″ long, 16 5/8″ wide, and 6 1/4″ high. If you’re using this bin, you’ll be fine!
- (2) 11.5″ cuts from the 1×8 for the short sides
- (2) 36″ cuts from the 1×8 for the long sides
- (4) 22” cuts from the 2×4 x 8′ for legs (see note above on dimensions to determine if you need to cut these shorter)
- (2) 11.5″ cuts from the 2×4 x 6′ for the side supports at the bottom
- (1) 36″ cut from the 2×4 x 6′ for the center support at the bottom
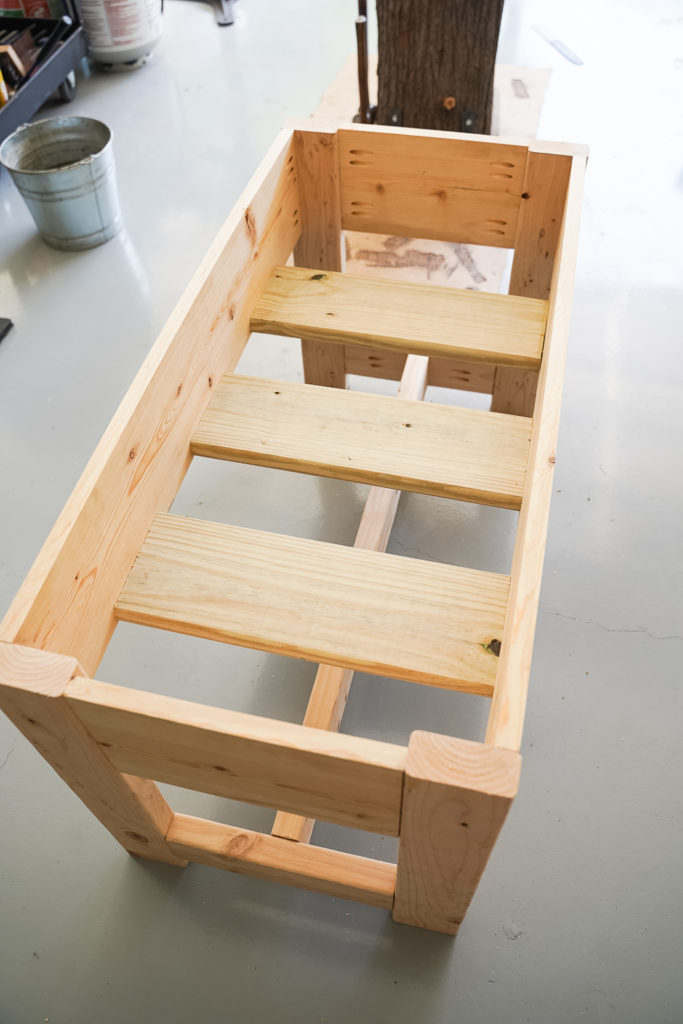
- (3) 17″ cuts from the 5/4×6 for the supports directly under the bin. If you’re adding the optional top, you’ll use the rest of this board there.
Screenshot the list below and carry it to the hardware store as your purchase reminder, or use to order online for store pickup!
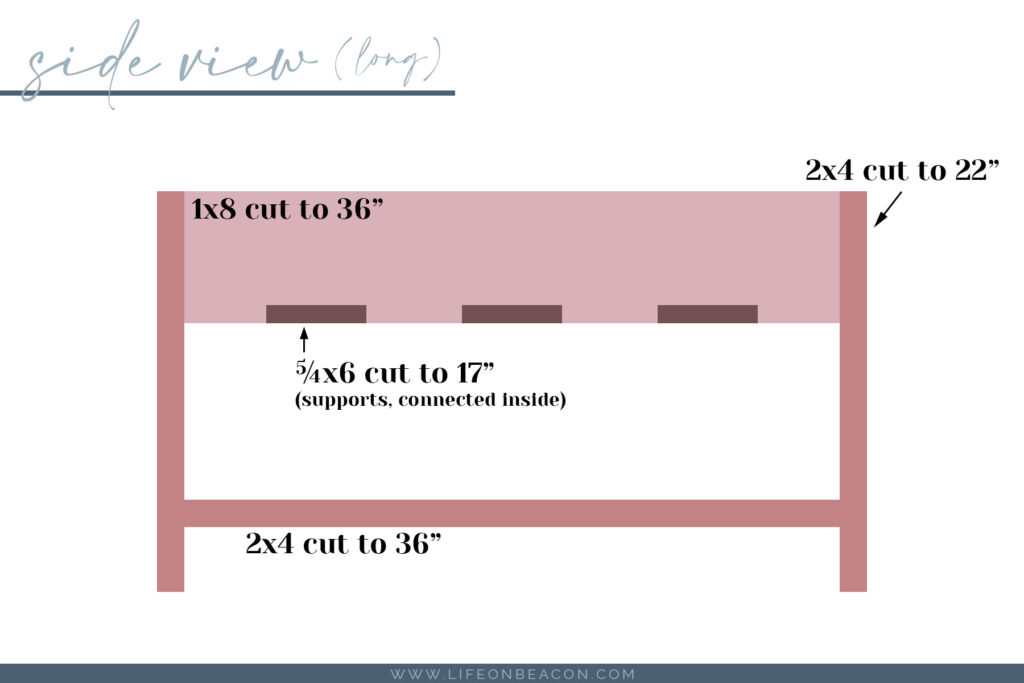
DIRECTIONS
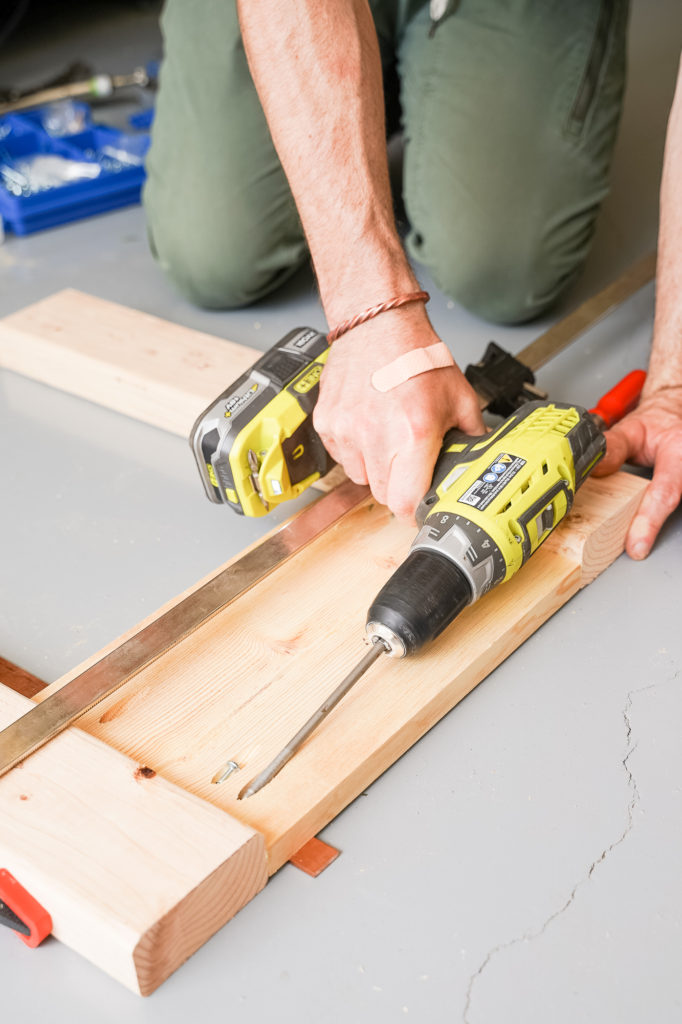
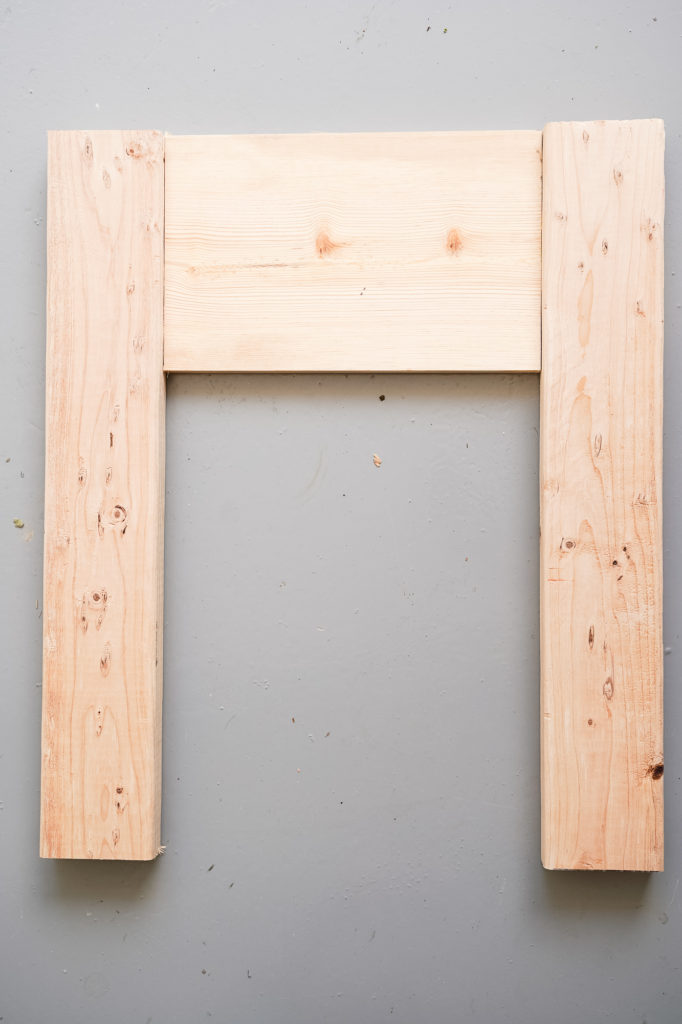

- Attach the short side boards to the tops of the legs using pocket screws. We also added a bit of wood glue on each side for extra support.
- Attach the long side boards using pocket holes, forming a rectangle on legs.
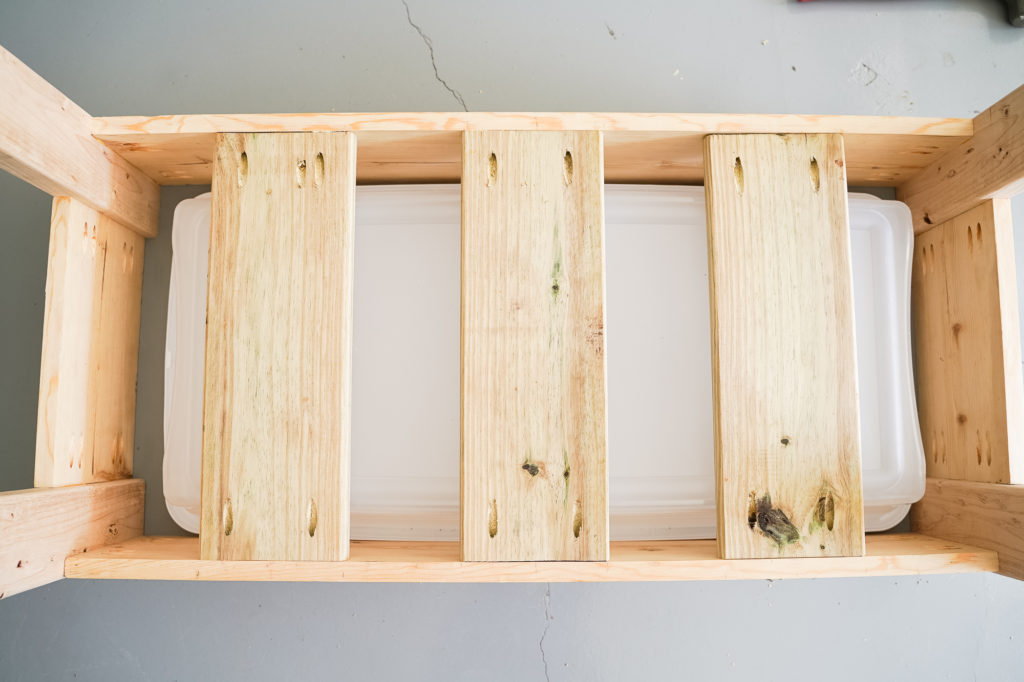
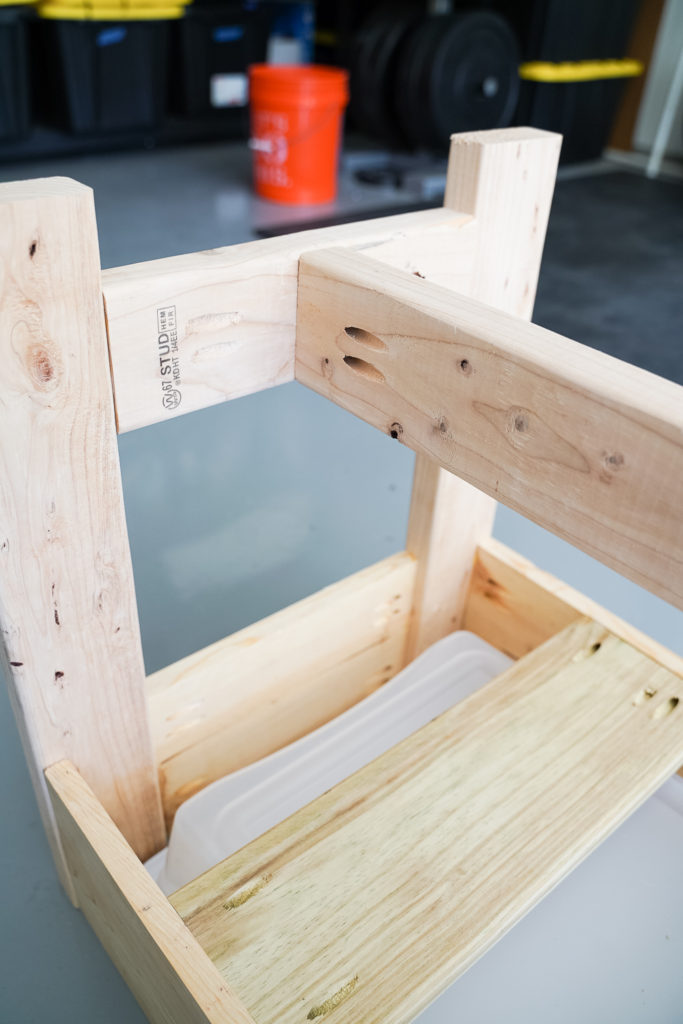
- Flip the entire table upside down, so it’s resting on the 1×8 boards, legs sticking up. At this point, we set our empty bin inside with the lid on to ensure it fit, and left it in there as we built the rest of the table.
- Attach the 5/4×6 supports to the underside of the bin holder using pocket screws. We put one in the center (at the 9″ mark), and one starting 5.25″ in from each leg which worked perfectly to support the weight of the bin with sand. You don’t necessarily want the two outer supports too close to the edges of the table because then most of the sand weight will sit on the center board. You want the three boards erred more to the center.
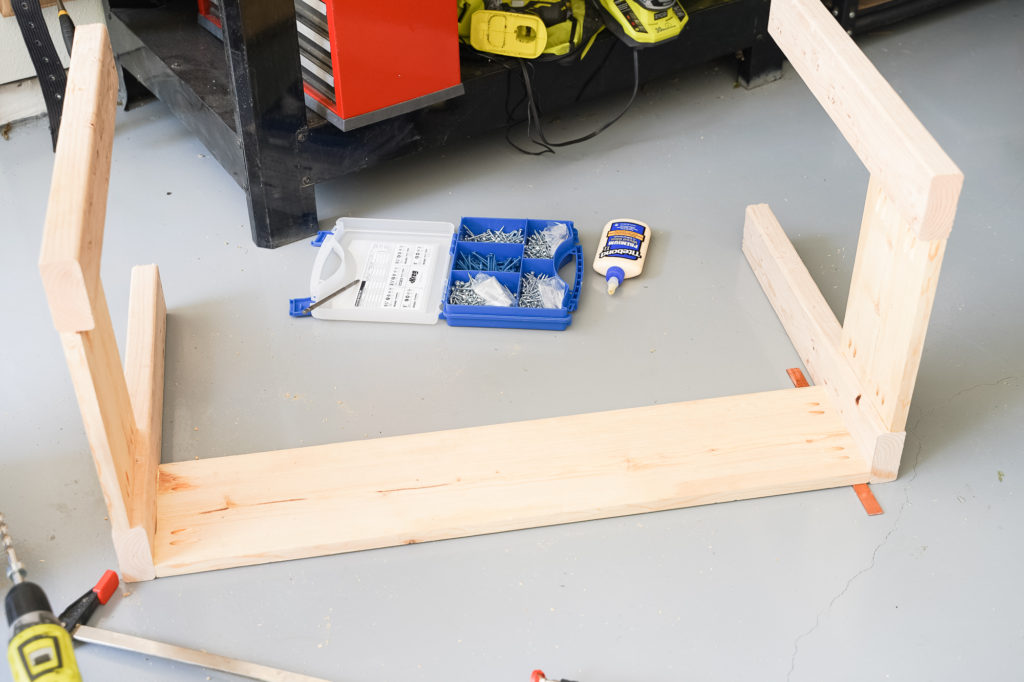
- Attached the side bottom supports using pocket screws, starting approx. 2″ from the base of the legs.
- Attach the center support to the side support using pocket screws. We’re using a single center support rather than one on each side so we can use a bench when the optional tabletop is set on top.
- Flip the table right side up and it’s ready to use! If you’re going to stain, paint, or seal, you should do that next and allow sufficient time for it to dry before use. Sand will stick to anything that’s not completely dry and you’ll never get it up.
SHOP FUN, AFFORDABLE SAND ACCESSORIES, WITH FREE DRIVE-UP PICKUP
Pin this