For Reese’s first birthday we opted to send little goodie bags to all of the kids in her class on her actual birthday and host a small family-only party at home to celebrate. The question was – what do you send as party favors for a class of 10 one year olds? We brainstormed ideas for weeks and kept coming back to crayons. But not just any crayons – custom crayons in little party favor bags, which we customized for each kid!
Full disclosure: I actually made these custom crayons a year ago and am just now getting around to posting them… as I contemplate making them again for my youngest.
My husband thought I was a little crazy for suggesting it at first. Wouldn’t it take a ton of time and make a huge mess? No, and no! Not if you know how to make them efficiently.
Follow along for all the tips you need to make custom crayons for your next birthday party or holiday goodie bag!
CHOOSING THE RIGHT CRAYON
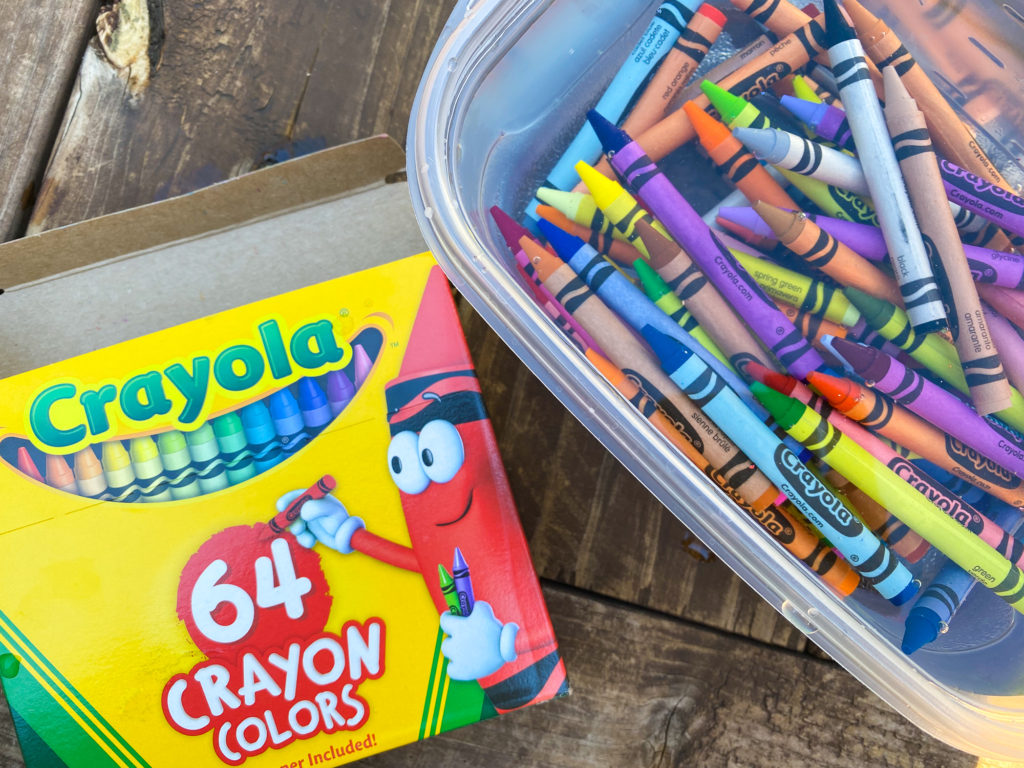
While it may be tempting to buy off-brand crayons from the dollar store to make your custom crayons, DON’T! They melt easily but then are super difficult to color with when done! The best crayons are the original Crayola crayons. You can buy a 64 pack from Target for $2.99 (buy online for Drive Up Pickup!) or order two boxes on Amazon for a little more. We used three 64 packs, which made 65 custom crayons of varying sizes.
PICKING YOUR MOLDS
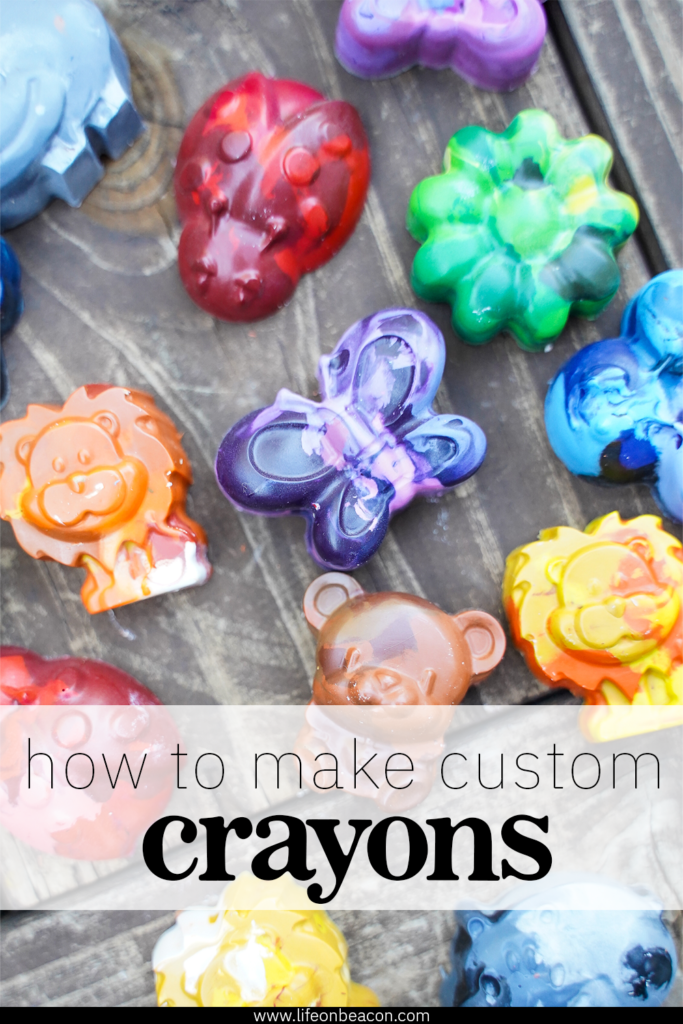
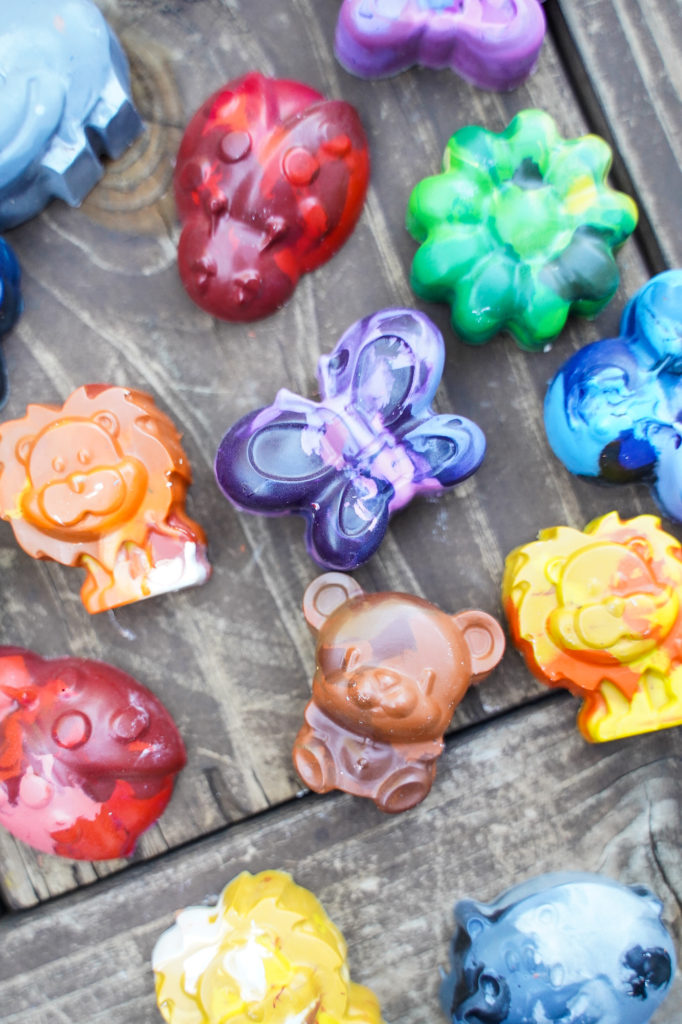
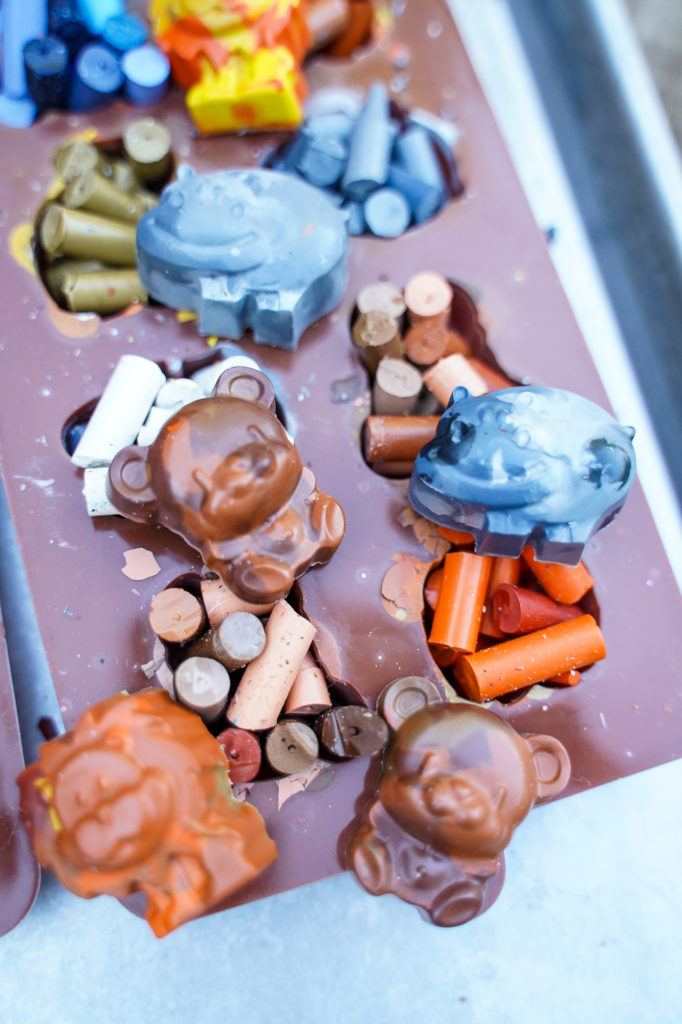
You’ll also need to order silicone candy molds to use to form your crayons. These Alphabet molds were a huge hit (we did the first letter of each kid’s name) – although they do take ~5-6 crayons per letter to make. We mixed them in bags with bugs, flowers, and animals made using these molds for a fun set for each child. Multiple molds = more crayons you can make in one batch.

THE PROCESS
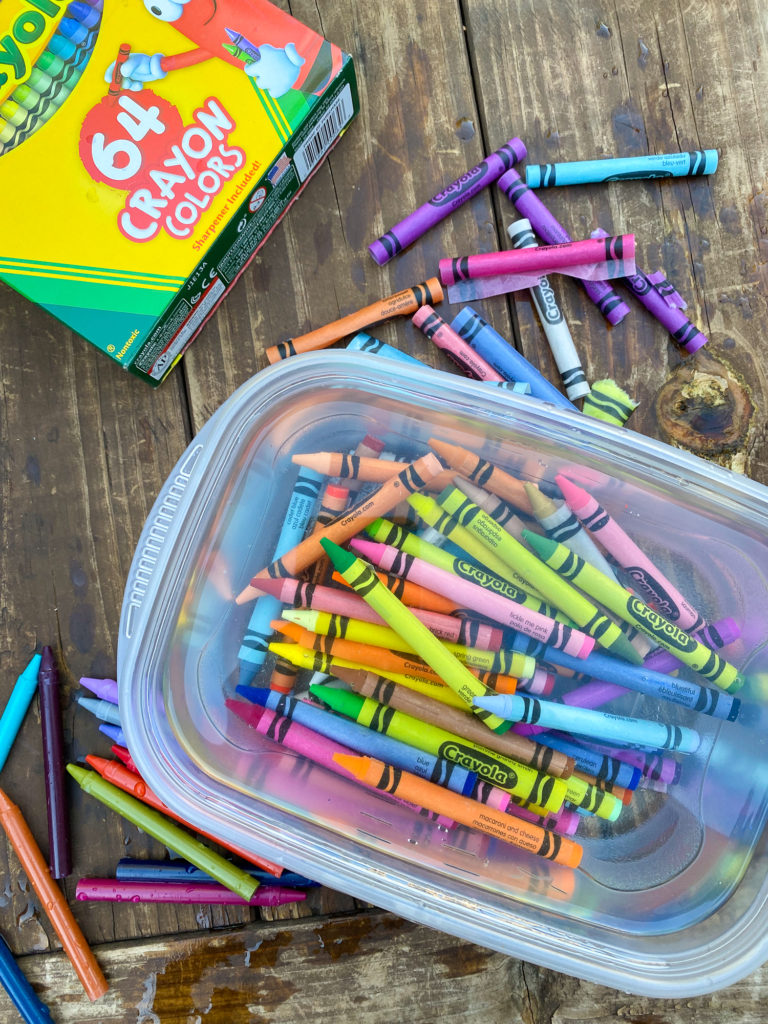
1 // Soak your crayons in water. After 5 – 10 minutes, the paper will just fall off! Set the unwrapped crayon in a colander to dry.

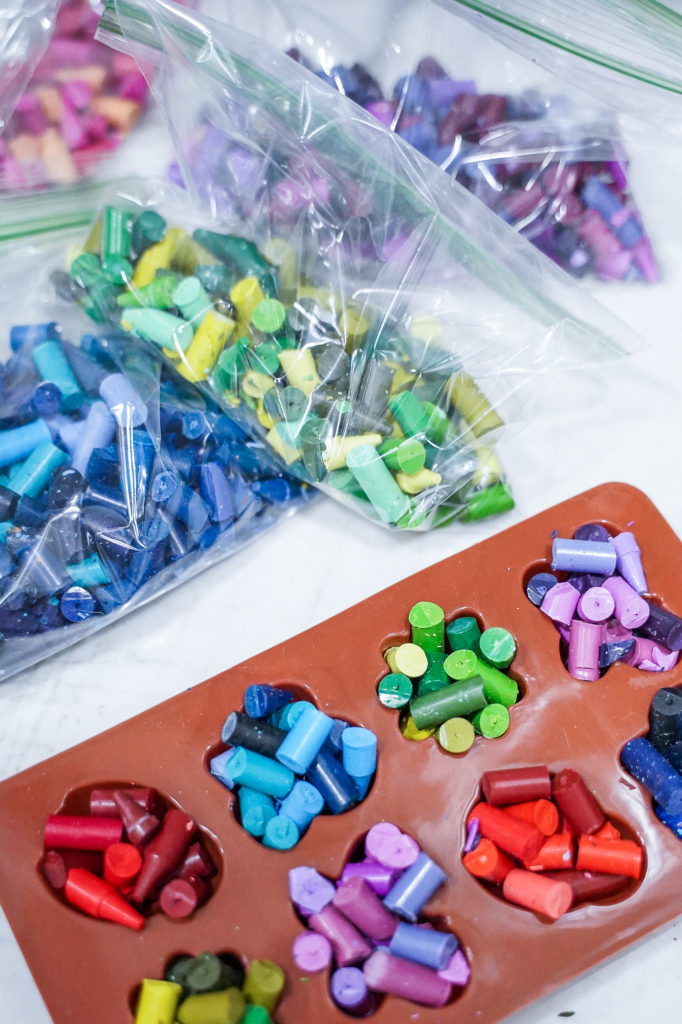
2 // Sort into color families. I love the look of marbled crayons so we sorted by color family (reds, greens, purples, etc.). The extras that were hard to sort were moved to a small pile my three year old used to make “crazy crayons” – crayons made of all the leftovers when we were done.
3 // Chop them up. Lay a paper towel over a plastic cutting board and use a knife to cut the crayons into smaller segments. We cut most crayons into fours, and kept some pieces smaller to fill in any gaps in the molds. Change the paper towel between colors to keep your chopped crayons from mixing. Store cut crayons in a small bowl or ziplock baggy for use.
4 // Heat your oven to 350. Some instructions may recommend lower heat, however we found Crayola brand crayons were a little tougher to melt and the higher heat helped.
5 // Place your molds on a tray. Not surprisingly, silicone molds full of melted wax are hard to remove from the oven! Laying them on a baking sheet will help with the transfer out of the oven and onto the counter or into the freezer to harden.
6 // Fill the mold cavities. Don’t be afraid to press the crayons into the mold, and have some sticking out the top. As they melt and settle, those grooves will fill in.

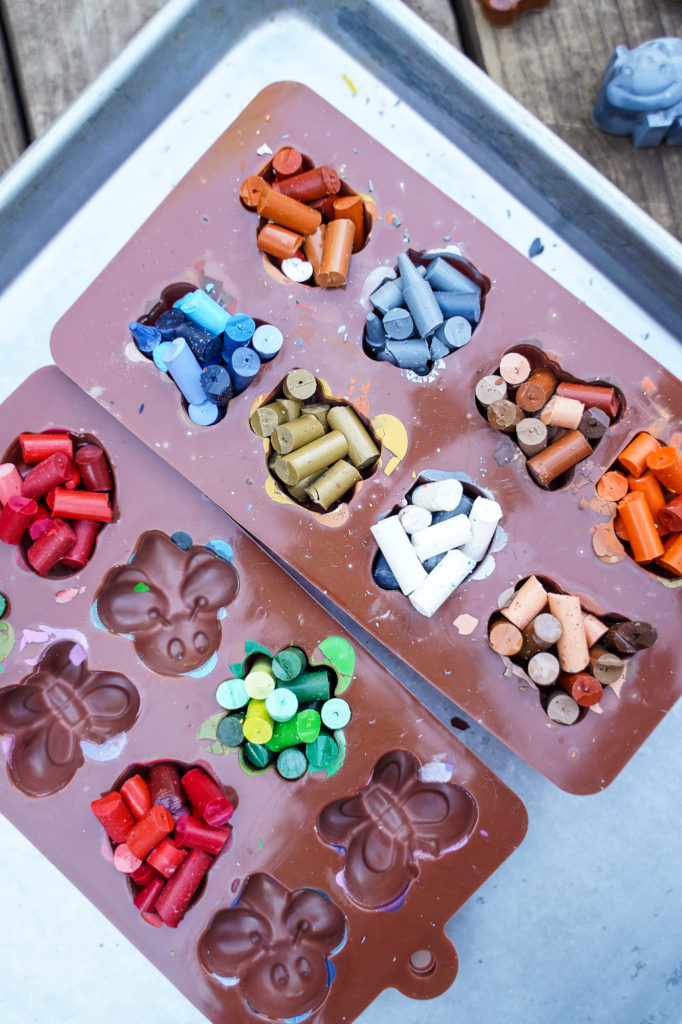
7 // Heat the molds and refill if necessary. Put them in the oven for 10 minutes, then start checking every 3-5 minutes until they are fully melted. For some molds, it may be necessary to add more crayons to fill them during the melting process (we had to do this for the letters). Don’t worry about getting melted crayon all the way to the top. It’s better to have crayons that are a little more shallow than ones that spill everywhere.
8 // Remove and let harden. They will harden in 10-15 minutes at room temperature, or faster in the freezer. We opted for the freezer so we could pop them out faster and start on the next batch.
If you’re using them for party favors or goodie bags, once cooled you can seal in plastic baggies. I love these cellophane self-sealing bags for cookies and other party treats. They worked perfectly for our custom crayons too!
Click here to download a FREE printable tag to include with your crayons!
So fun and way easier than you thought, right? We’re making more as soon as our kitchen reno is done – hopefully just in time for our youngest to celebrate his first birthday at school!
PIN THIS